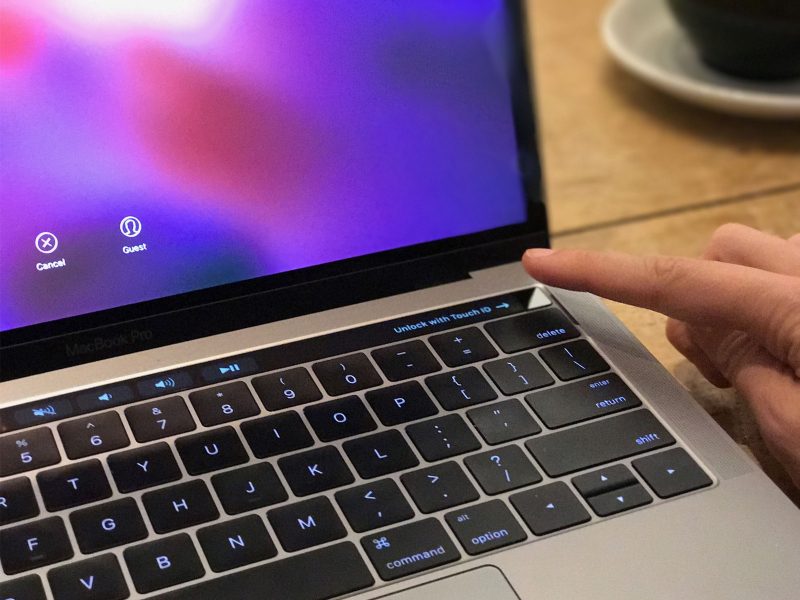
Using Touch ID on Your MacBook Pro

Have you used Touch ID? If you own one of the recently released iPhones, chances are you HAVE used it. It’s the built-in system for privacy that Apple implemented to unlock devices and authorize Apple Pay. Did you know you could use it on your MacBook Pro? This article is all about how to use Touch ID on your MacBook Pro, so get ready to take note. Once you have this set up, you’ll wonder how you did so long without using it.
What is Touch ID
Maybe you are new to Apple products or you have been living under a rock. No judgement here. I’ll break it down for you. Touch ID is Apple’s security system for different devices. It’s biometrics! Apple’s Touch ID uses up to five fingerprints on the MacBook Pro to give access to the device instead of using a password or passcode. Once you add your fingerprints, you’ll be able to do a variety of tasks including using Apple Pay, authorizing purchases from iTunes, and switching between users, among other things. And because fingerprints can’t be forged, your MacBook Pro will be super secure from people who would want to steal your information and use it for unsavory purposes.
Setting up Touch ID for your Mac
You will be asked to register your fingerprint for Touch Id when you set up the 2016 MacBook Pro initially, but you can also register other fingerprints when you want to. You might want to share your MacBook Pro with different members of the family or you might be sharing the Pro at work on a shared computer. In either case, you don’t have to worry about what happens to your fingerprints. When you add your fingerprints, they are encrypted and stored in the MacBook Pro’s Secure Enclave. That means that you don’t have to worry about someone else getting access to your fingerprints and being able to access the contents of your MacBook. Only registered fingerprints can access your MacBook Pro, so it’s important to make sure everyone you want to be able to access the MacBook Pro has their fingerprints added.

Adding your fingerprints
Go to the menu and choose System Preferences. Next, choose Touch ID and Add a fingerprint. You’ll need to enter your user password. You can name a fingerprint by going back to System Preferences and selecting Touch ID. Press the Tab key to look through the fingerprints you have stored, and you simply click on it to name it. Press return once you have named your fingerprint.
Deleting a fingerprint
Every once in a while you might want to delete a fingerprint. To do so, go back to System Preferences and choose Touch ID. Hover over the fingerprint you want to delete and look for the X to appear in the upper left corner of the box. When it appears, click it and enter your password. Press delete to confirm that you want to delete the fingerprint.
Changing your Touch ID settings
When you’ve set up your fingerprints, you can choose just what you’d like for those fingerprints to be able to authorize. All options are selected by default, but you can choose which options you want selected by unchecking the boxes next to them. You’ll need to go to the menu and click on System Preferences. Select Touch ID in the preference pane and select or deselect the options you choose.
How you can use Touch ID on your MacBook Pro
You will need your password to login on your iPad, iPhone, or MacBook Pro. After that, however, you will need be able to use Touch ID. You can use Touch ID to switch between users, authorize store purchases, or use Apple Pay.
To log in with Touch ID, simply open your MacBook Pro or touch the Touch ID button. Press your finger down on the Touch ID sensor.
To switch between users with Touch ID, you’ll need to have registered different fingerprints with each account. Once each account has been logged in after the initial boot up, you may then switch between accounts easily by using Touch ID.
Why use Touch ID with Apple Pay
If you like to shop online, you will be able to use Apple Pay to authorize payments that you make on your Mac using the Touch ID. It takes a bit of a process, but once you get it set up initially, you are done! You won’t have to worry about typing your credit card information into every site.
Rebooting your MacBook Pro
Touch ID has replaced the old power button that the MacBook Pro used to have, and it can be used for some of the same purposes. To power on your MacBook Pro, just push down on the Touch ID button. If you want to reset your MacBook Pro you can also do the same thing. If your system is acting strangely or becomes unresponsive, you can use the Touch ID button to reset it.
Resetting your Touch ID data
If you ever have an issue where your Touch ID stops working, you can reset your Touch Bar. This will erase any current Touch ID registrations at the root level. To do this, restart your Mac and hold down Command and R while it is rebooting. This will get you into recovery mode. Launch Terminal and enter “xartutil – – erase-all”, and push enter. It will ask if you want to confirm. Press yes and enter again. Exit Terminal and restart your Mac in the regular mode.
Using your Touch ID on the MacBook Pro can make many tasks easier and faster. Everyone can benefit from having a little extra time, and once you take a little time to set up your Touch ID, you will be able to save lots of time over the long life of your MacBook Pro.


